
Moblin Setup
In this guide we will go through setting up Moblin and OBS using our Video Ingest servers
To utilise the power of Moblin, we only recommend using SRT and NOT RTMP. This guide will only focus on SRT
Log into AntiScuff Client Portal through this link client portal on a device which isn’t your streaming phone.
Under “Your Active Products/Services” click on “Video Ingest – Video Ingest Server“

Find “Scan QR Code to add to Moblin“

Where the screenshot shows “QR CODE” yours will display a QR Code.
Open the Apple camera app on your phone (IMPORTANT: NOT MOBLIN) and scan this code with your device
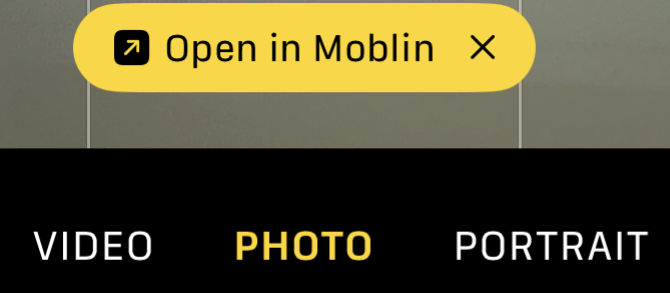
Your phone should show something similar to above (Screenshot from iPhone 15 Pro Max) – press “Open in Moblin“

In the centre of the screen it should show “URL import successful”
Tip: You can press anywhere on screen to remove this notification
Confirm the settings imported correctly:

Press the Cog wheel in the Top Right corner, just under the time
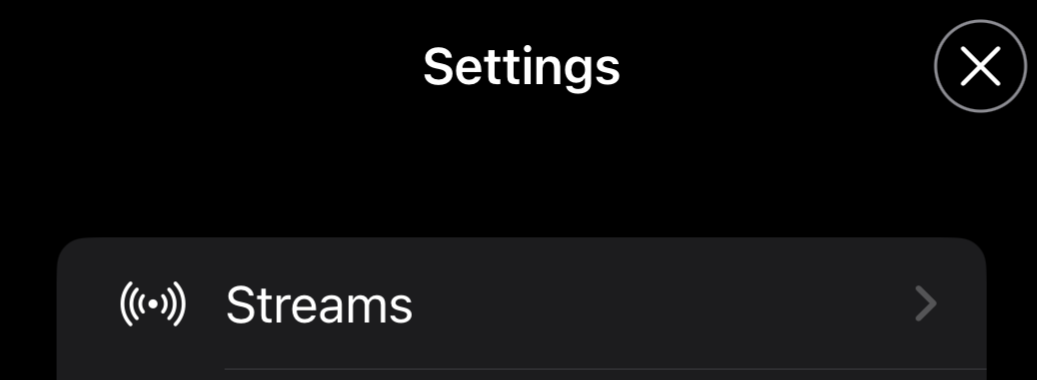
Under the Settings menu, press “Streams“
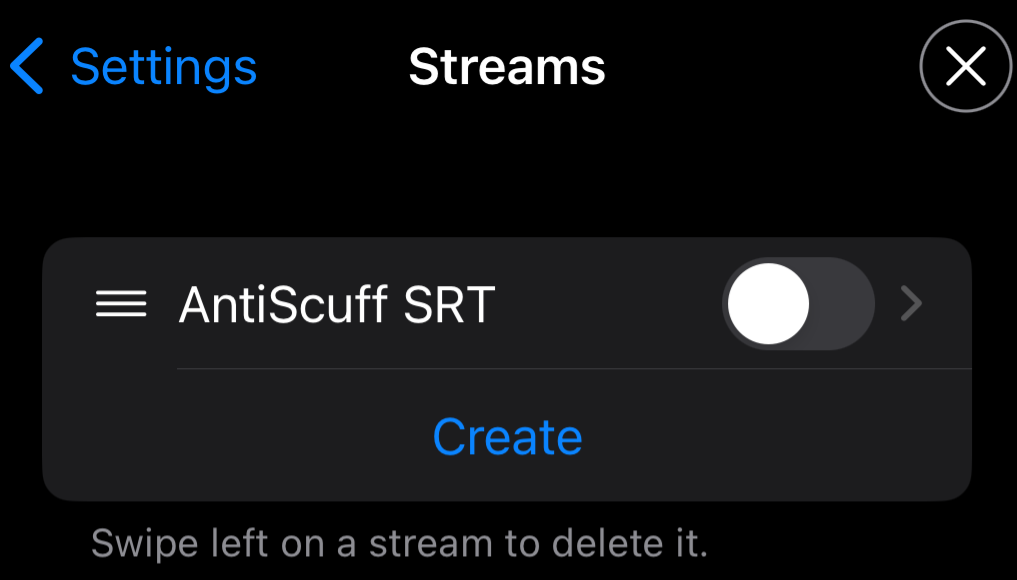
You should see the newly added “AntiScuff SRT” stream
Note: At this stage, it will not be active
Press on the name “AntiScuff SRT”

Confirm the URL is the same as the one from the Client Portal. Press “Streams” to go back to the Stream/Connection list once confirmed
TIP: Within this menu you can set things such as your Twitch & Kick profiles to show chat on screen.
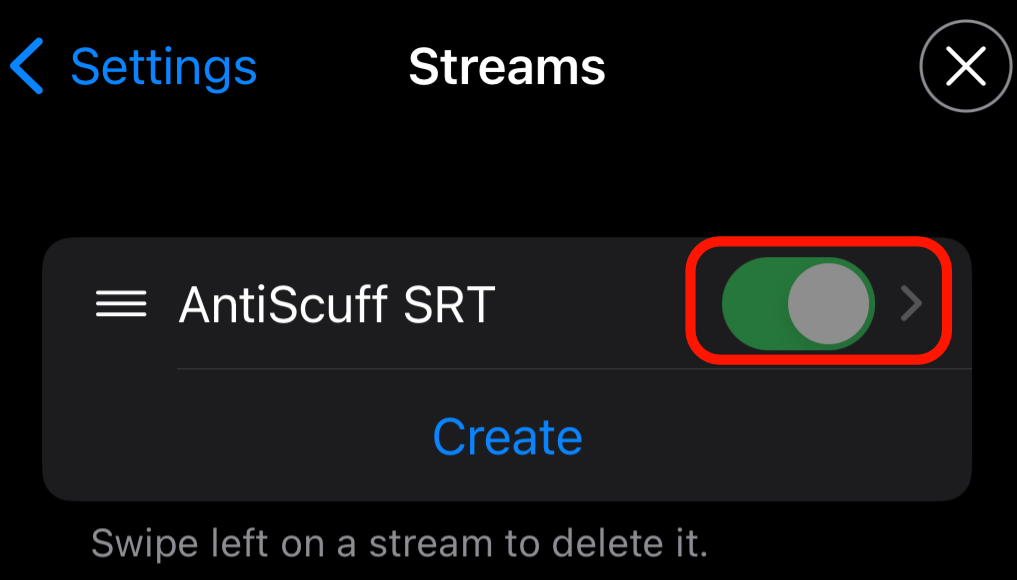
Press the Toggle (highlighted) to make the connection active, it should then show green as above. Moblin has now been set up
OBS Setup
Adding the Media Source to OBS

Within the client portal you will see the above, copy it to clipboard as we will need it shortly

In YOUR OBS, click on the + icon, and Media Source

In the box which pops up, put in a unique and rememberable name (1) and press OK (2)
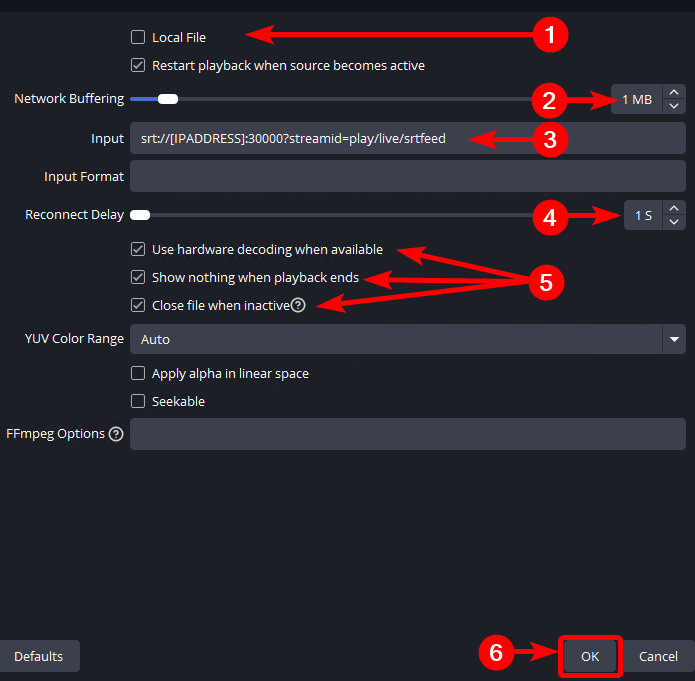
Follow these steps:
- Untick “Local File“
- Network Buffering – 1 MB
- Input – URL copied from Portal earlier
- Reconnect Delay – 1s
- Ensure “Use hardware decoding when available“, “Show nothing when playback ends” and “Close file when inactive” are all checked.
- Press OK once done
IMPORTANT: Ensure your media source looks the same as the above, with the exception of number 3, which should be your URL from the dashboard!
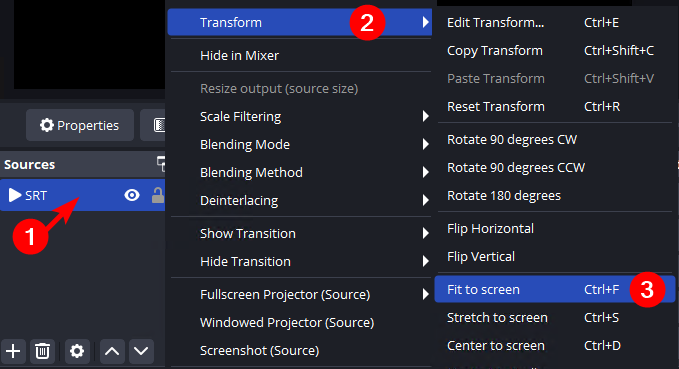
Back in the Sources list, right click on the newly created Media Source (1), go to “Transform” (2) and click “Fit to screen” (3)

The Preview should now look like the above when the Media Source is selected